
How to plan a wedding candy bar for a unique celebration
Planning a wedding candy bar can feel overwhelming when you want something truly special. You envision a stunning display of personalised sweets that guests will remember, but coordinating colours, choosing candies, and organising the setup presents numerous decisions. Many couples struggle to balance aesthetic appeal with practical execution, unsure where to start or how to create a cohesive look. This comprehensive guide walks you through every step, from initial preparation and candy selection to creative personalisation ideas that transform your candy bar into a memorable celebration centrepiece that reflects your unique style.
Table of Contents
- Key takeaways
- Preparing for your wedding candy bar
- Selecting and organising candy for your bar
- Setting up and maintaining your wedding candy bar
- Creative ideas to personalise your candy bar
- Discover personalised wedding sweets and favours
- FAQ about planning a wedding candy bar
Key Takeaways
| Point | Details |
|---|---|
| Colour coordination and lighting | Maintaining a cohesive colour palette and appropriate lighting elevates the luxury feel of the candy display. |
| Planning tools and materials | Use a detailed planning checklist and a materials list to organise the setup efficiently. |
| Personalised packaging and sweets | Personalised wrappers and packaging turn ordinary sweets into keepsakes guests will remember. |
| Restocking keeps the bar inviting | Regular restocking prevents a bare or chaotic display and keeps guests engaged. |
| Clear themes for cohesion | Centre the candy bar around a clear theme to enhance overall celebration cohesion. |
Preparing for your wedding candy bar
Successful candy bar planning begins well before your wedding day. Start by selecting a cohesive colour palette of 2-3 complementary colours that match your overall wedding theme. This colour coordination creates visual harmony and prevents your display from looking chaotic or mismatched. Consider your venue’s existing décor, your wedding flowers, and any accent colours in your invitations or bridesmaids’ dresses.
Location selection matters tremendously for both aesthetics and practicality. Choose a spot with good natural lighting during your reception time, or plan for soft artificial lighting that highlights your candy colours without creating harsh shadows. Avoid direct sunlight that might melt chocolate or fade candy wrappers. The area should be easily accessible to guests but not so central that it creates bottlenecks in foot traffic.
Gather your essential materials well in advance:
- Tablecloths or runners in your chosen colours
- Glass jars, bowls, or custom candy containers in varying heights
- Serving scoops, tongs, and spoons for each candy type
- Clear labels identifying candy types and allergen information
- Favour bags or boxes for guest takeaways
- Backup supplies stored nearby for quick refills
- Decorative elements like ribbons, flowers, or themed signage
Create a detailed checklist that includes candy quantities based on your guest count. A general rule suggests 100-150 grams of sweets per guest when the candy bar serves as both entertainment and favours. Adjust this amount based on your reception length and whether you’re serving other desserts.
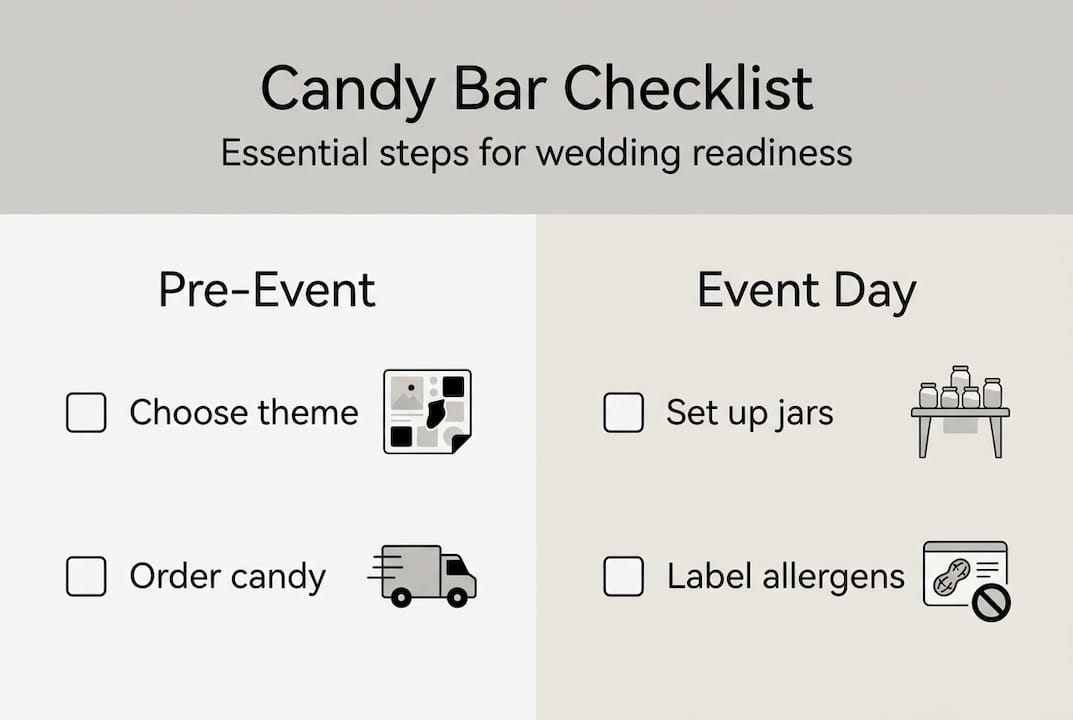
Pro tip: Prepare a lighting test a week before your wedding. Set up sample jars in your chosen location at the same time as your reception to see how natural light affects candy colours and make adjustments if needed.
| Material category | Essential items | Optional upgrades |
|---|---|---|
| Display vessels | Glass jars, bowls | Vintage apothecary jars, tiered stands |
| Serving tools | Basic scoops, tongs | Silver-plated scoops, personalised spoons |
| Packaging | Paper bags | Custom printed boxes, organza pouches |
| Signage | Printed labels | Chalkboard signs, calligraphy placards |
Consider personalised packaging for your sweets to add a distinctive touch that guests will appreciate. Custom wrappers featuring your names and wedding date transform ordinary sweets into keepsakes. This preparation phase sets the foundation for a stress-free setup and a polished final presentation.
Selecting and organising candy for your bar
Candy selection requires balancing visual appeal, guest preferences, and practical considerations. Start by categorising potential sweets into groups: chocolates, gummies, boiled sweets, mints, and speciality items. This variety ensures every guest finds something appealing regardless of their taste preferences or dietary restrictions.
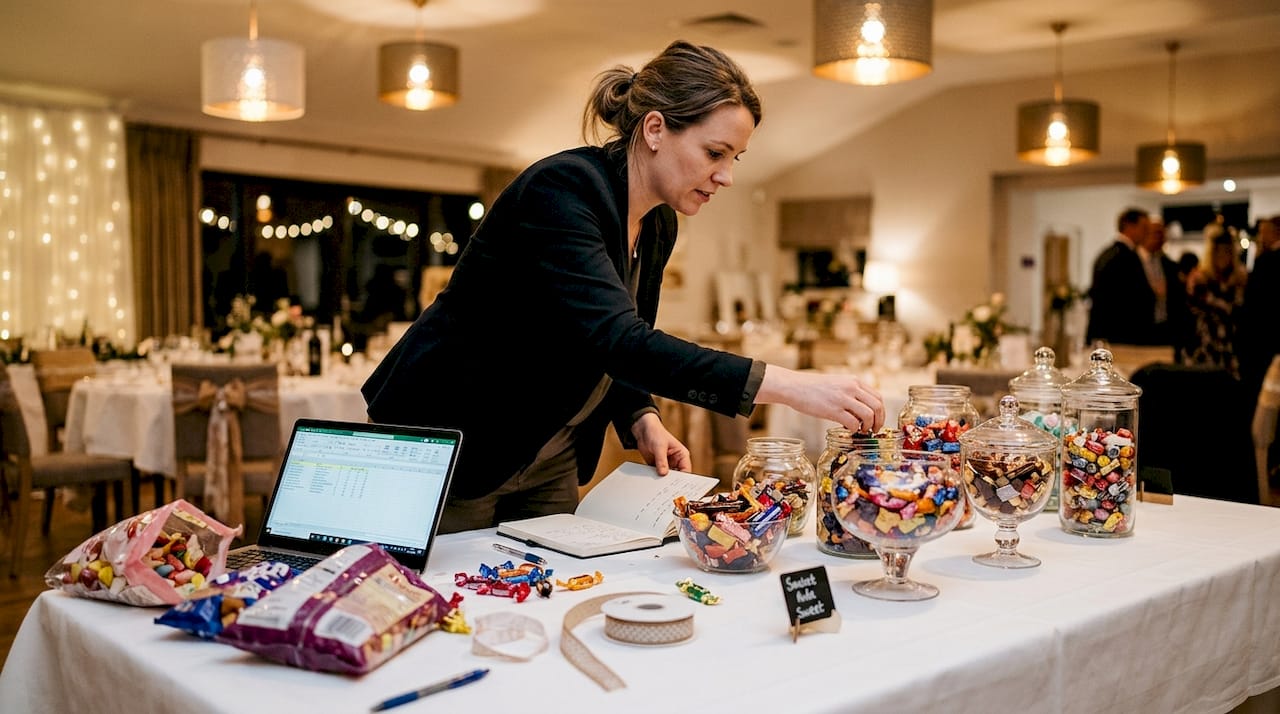
Match your candy colours precisely to your chosen palette. Order samples if possible to see how wrapper colours appear under your venue’s lighting. Remember that cohesive colour coordination elevates the entire display from casual to sophisticated. Avoid introducing random colours that clash with your wedding theme, even if a particular sweet seems appealing.
Display organisation impacts both aesthetics and functionality. Use these strategies for maximum effect:
- Place taller containers at the back and shorter ones at the front for visual depth
- Group similar candy types together whilst maintaining colour flow
- Position popular choices like chocolate in easily accessible spots
- Use tiered stands to create height variation and visual interest
- Label each container clearly with candy names and allergen warnings
- Keep serving utensils directly beside or inside each container
Balance quantity with variety by offering 6-8 different candy types rather than overwhelming guests with too many choices. This focused selection looks more curated and reduces decision fatigue. Consider your guest demographics when choosing sweets. A younger crowd might appreciate sour gummies and novelty sweets, whilst an older audience often prefers classic chocolates and mints.
Develop a restocking strategy before your event begins. Assign a trusted friend or venue staff member to monitor candy levels and refill from backup supplies stored nearby. Quick refills maintain the luxury feel and prevent your display from looking picked over during peak guest traffic.
Pro tip: Purchase 20% more candy than your calculations suggest. Leftover sweets can be used for thank-you gifts or enjoyed during your honeymoon, but running out mid-reception creates disappointment.
| Candy type | Average cost per kg | Shelf life | Theme suitability | Allergy considerations |
|---|---|---|---|---|
| Milk chocolate | £8-15 | 6-12 months | Classic, romantic | Dairy, may contain nuts |
| Gummy sweets | £6-10 | 12-18 months | Playful, colourful | Gelatine (not vegetarian) |
| Boiled sweets | £5-8 | 18-24 months | Traditional, elegant | Generally allergy-friendly |
| Personalised mints | £12-20 | 12 months | Sophisticated, custom | Minimal allergens |
| Neapolitan chocolates | £15-25 | 6-9 months | Luxury, personalised | Dairy, soy lecithin |
When comparing bulk candy versus pre-packaged personalised sweets, consider that bulk options offer cost savings and flexibility in quantities, whilst personalised items provide memorable keepsakes that reinforce your wedding theme. Many couples successfully combine both approaches, using bulk sweets for the main display and personalised items as special favour additions.
Ensure all candies comply with allergy considerations by clearly labelling common allergens like nuts, dairy, and gelatine. Offer at least one or two allergy-friendly options so guests with restrictions can participate in the candy bar experience.
Setting up and maintaining your wedding candy bar
Physical setup on your wedding day should follow a systematic approach to ensure everything looks polished and functions smoothly. Begin setup at least two hours before guests arrive to allow time for adjustments and photography.
Follow these steps for efficient setup:
- Lay your tablecloth or runner, ensuring it’s wrinkle-free and properly centred
- Position your tallest display pieces first to establish the back row
- Arrange medium-height containers in the middle section
- Place shortest vessels and favour bags at the front for easy guest access
- Fill each container approximately three-quarters full to allow for natural settling
- Add serving utensils and ensure they’re easily accessible
- Position signage and decorative elements around the display
- Do a final visual check from multiple angles to spot any gaps or imbalances
Lighting setup requires careful attention to create the right ambience. Use soft, warm lighting to enhance the inviting atmosphere and highlight your candy colours without creating harsh glare on glass containers. Avoid fluorescent overhead lights if possible, opting instead for small LED spotlights or string lights that add a romantic glow. Test your lighting before guests arrive to ensure it photographs beautifully and doesn’t create unwanted shadows.
Signage serves both practical and decorative purposes. Create clear labels designating each candy type with ingredient information and allergy warnings. Consider adding a welcome sign explaining how guests can fill favour bags or enjoy sweets during the reception. Use fonts and colours that match your wedding stationery for visual consistency.
Hygiene practices protect your guests and maintain food safety standards:
- Provide individual scoops or tongs for each candy type to prevent cross-contamination
- Use covered containers when possible to protect sweets from airborne particles
- Position hand sanitiser nearby for guest use before serving themselves
- Keep backup supplies covered and stored in a cool, dry location
- Remove and replace any sweets that fall on the table or floor immediately
Pro tip: Use quick refill containers kept just behind your display table. Pre-fill these backup jars so your assigned helper can swap empty containers for full ones in seconds rather than refilling on the spot, maintaining elegance throughout the event.
Assign a reliable helper to monitor your candy bar during the reception. This person should check every 30 minutes for:
- Candy levels that need replenishing
- Spills or mess requiring cleanup
- Empty favour bags or boxes needing restocking
- Serving utensils that have fallen or been misplaced
For couples seeking a truly luxurious candy bar experience, focus on cohesive colour coordination, soft ambient lighting, and quick refills throughout your reception. These three elements work together to maintain visual appeal and guest satisfaction from the first arrival to the final farewell.
Keep cleaning supplies discreetly nearby for quick touch-ups. A small bin for discarded wrappers prevents mess from accumulating on your display table. Regular maintenance keeps your candy bar looking fresh and inviting throughout your entire celebration, ensuring late-arriving guests enjoy the same beautiful presentation as early attendees.
Creative ideas to personalise your candy bar
Personalisation transforms a standard candy display into a meaningful reflection of your relationship and celebration style. Start with custom wrappers featuring your names and wedding date on mini polo mints or chocolates. These small details create keepsakes guests will treasure long after your wedding day.
Incorporate themed décor that tells your story as a couple. If you met at university, use vintage books as display risers. Beach wedding? Fill the base of glass jars with sand and shells. Garden celebration? Weave fresh flowers around containers. These personal touches make your candy bar uniquely yours rather than a generic sweet table.
Offer guest favour bags in various sizes so attendees can take home their favourite combinations. Provide small bags for individual treats and larger ones for families with children. Print custom labels or stamps with your wedding hashtag or a sweet message like “Love is sweet, take a treat” to reinforce your theme.
Create interactive elements that engage guests beyond simple serving:
- Build-your-own favour bag stations with instructions and suggested combinations
- Candy guessing games with prizes for closest estimates
- Recipe cards showing how to use certain sweets in desserts at home
- Personalised scoops engraved with guests’ table numbers as keepsakes
- Chalkboard signs inviting guests to write sweet messages or marriage advice
Add bespoke signage featuring romantic quotes, song lyrics that are meaningful to you as a couple, or timeline highlights of your relationship. Hand-lettered chalkboards or professionally printed signs in your wedding fonts create visual cohesion with your other stationery.
Consider sustainable or locally sourced sweets if environmental consciousness matters to you. Many artisan confectioners create beautiful handmade sweets using organic ingredients and eco-friendly packaging. Highlight this choice with small signs explaining your commitment to sustainability, which resonates with many modern guests.
Pro tip: Coordinate your candy bar theme with other wedding elements like your cake table, photo booth backdrop, or cocktail hour displays. This cohesive approach creates a seamless visual story throughout your venue and makes professional photographs look more polished and intentional.
Explore custom neapolitan wedding chocolates that combine classic flavours with personalised presentation. These sophisticated options elevate your candy bar from casual to refined whilst still offering the sweet indulgence guests expect. Mix luxury personalised items with complementary bulk sweets to balance budget considerations with special touches.
Don’t forget sensory elements beyond visual appeal. Incorporate scented candles in complementary fragrances like vanilla or caramel near your display. Play soft background music if your candy bar sits in a separate area from the main reception. These multi-sensory details create a complete experience that guests remember.
Discover personalised wedding sweets and favours
Now that you understand how to plan and execute a stunning candy bar, explore the curated selection of personalised wedding sweets designed specifically for celebrations like yours. Mini polo mints wedding favours offer classic elegance with customised wrappers that match any colour scheme. Personalised wedding chocolates provide luxury options that guests genuinely appreciate as keepsakes.
These convenient choices eliminate the stress of sourcing and customising sweets yourself whilst ensuring professional quality that photographs beautifully. Each product features customisable packaging designed to complement your wedding colours and theme. Mini rolls personalised wedding sweets combine nostalgic flavours with modern personalisation, perfect for couples wanting both tradition and individuality. Browse the complete collection to find combinations that reflect your unique celebration style whilst delighting every guest who visits your candy bar.
FAQ about planning a wedding candy bar
How many types of candy should be included?
Include 6-8 different candy types to provide variety without overwhelming guests. This range ensures everyone finds appealing options whilst maintaining a curated, intentional look rather than a cluttered display.
What are the best colours for candy bars?
Choose 2-3 colours that complement your wedding palette, typically including one neutral like white or cream alongside your accent colours. Metallic gold or silver adds elegant sophistication to any colour scheme.
How to keep candy fresh during the event?
Store backup supplies in cool, dry locations away from direct sunlight and heat sources. Use covered containers when possible and assign someone to replace sweets that have been exposed for extended periods, especially chocolates.
Can candy favour packaging be personalised?
Yes, many suppliers offer custom printing on wrappers, boxes, and bags featuring your names, wedding date, or chosen designs. Personalised packaging transforms ordinary sweets into memorable keepsakes guests will treasure.
What size candy portions work best for guests?
Provide small favour bags holding 100-150 grams of mixed sweets, which offers satisfying variety without excess. Families with children may appreciate slightly larger portions, so offer multiple bag sizes if possible.
Recommended
- Wedding Sweets - Personalised Wedding Favours - Mini Rolls - Polo Mint – Personalise4uLtd
- Wedding Sweets - Personalised Wedding Favours - Mini Polo Mints, Foil – Personalise4uLtd
- Best Personalised Chocolate Favours for Weddings in Nottinghamshire – Personalise4uLtd
- Best Personalised Chocolate Favours for Weddings in Nottinghamshire – Personalise4uLtd